
Late 1890s Corset Part 4 - Flossing & Wrap Up
- Jul 22, 2021
- 3 min read

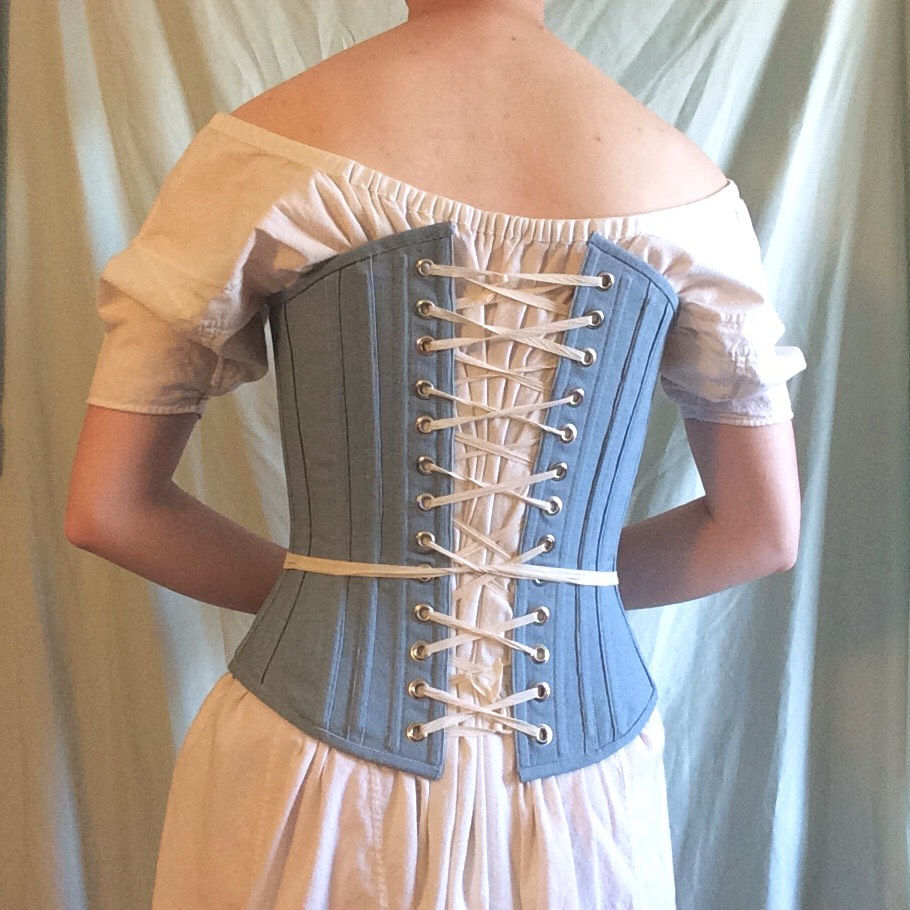
My 1890s corset is finally constructed and wearable, but it's not quite complete yet. It's time for some finishing touches!

Flossing
For the flossing, I used a silk buttonhole twist from B&T in a cream color that matches the lacing in the back and the lace I'll use to decorate the top edge of the corset later.
I started along the top edge of the boning with a simple crossed pattern, like these instructions from Sidney Eileen, but only doing two threads in each direction and... not going in the correct order. It turned out the same, so whatever I guess. My flossing here isn't perfect, but I wanted to get a feel for it in a place where I could cover my mistakes.
Should I have just done a test on some scrap fabric? Yes! Did I just jump in with no practice instead? Also yes!

While I do like the simplicity of the flossing design I used along the top, I wanted something a bit prettier for the bottom edge, since it'll be exposed.
I found this flossing design from 'Bridges on the Body,' a corset-sewing blog, and fell in love with it. (Seen on the far right in the photo.) I was afraid the design would be difficult, but it's really deceptively easy. I even followed the directions this time! It took a few attempts to get it perfect - figuring out the spacing and whathaveyou - but I had really nailed it by bone #5. (I have to say that it also looks really nice with fewer crisscrosses, too.)
I used a slightly altered version for the bones on either side of the lacing, and yet another variation on the busk. (The left two and second-to-right designs in the photo.)

Lace
With the flossing done, I could attach some lace! In my stash I had a cream-colored, two-layered lace that had holes for ribbon along the top. I attached it using small, spaced-out stitches, with the more solid part of the lace (under the lacing holes) lined up right under the edge of the binding.
I found quarter-inch grosgrain ribbon in a similar shade of blue to the corset and threaded it through the lace. I secured the end to the binding at the lacing panels, and tacked the ribbon at a few more points to keep it upright. I left ribbon tails at the busk so I can tie a bow at the center front when I'm wearing the corset.
And then I was done! Completely, finally, 100% done.

Final Thoughts
I thought sewing a corset would be really difficult and take me all year to do, but it didn't. I started back in January and finished in June, and that includes long periods of inactivity. It's not perfect by a long shot, but I'm proud of my work and I've learned a lot.
This project was kind of expensive, though (at least by my standards). All told, I spent about $77 on this project. I could have saved a few dollars if I didn't buy way too much fabric (3 yards when I could have gotten 1.5 yards and still had extra) and an extra spool of thread, or if I opted for cotton embroidery floss instead of silk buttonhole thread. But I also could have spent a lot more if I had splurged on coutil instead of canvas. I'm doing a lot of stash-bushing this year, so I had room in my sewing budget.
So, what's next? While I do have some more late-Victorian projects planned (like combinations, a corset cover, padding/"enhancers", etc...), I'm headed back into the Regency for a while to do some stash busting and expand my wardrobe a bit. I also have a few small one-off, non-historical projects that need my attention too.
Stay warm. Stay safe. Stay healthy.


Comments